Congratulations, you’re moving on up. But first—you’ve got to move on out! Remember that big old deposit you had to put down before you could even move into your apartment? Wouldn’t it be great if you could get it all back?
Picture this: a complete cleaning checklist designed with your money in mind.
This handy guide includes lists of supplies and detailed breakdowns for how to clean everything. We’ll keep it simple, though. You have enough to worry about. After all, moving out of your apartment is work.
While we can’t help with the actual scrubbing, what can we lighten for you?
The guesswork!
Check out our before cleaning supply lists, our in-depth room cleaning lists, and don’t miss the FAQs section at the end.
If you’ve read our previous article about the 5 Steps to Keep Your Apartment More Organized, you’ll be starting with an already sparkly-clean baseline!
Before You Clean
We’ve all been there …
You finally find some time to mop the kitchen only to find you’re completely out of floor cleaner.
Hopefully, you already have most of these cleaning supplies on hand. To be on the safe side, start here in case you need to go shopping.
And get this: We’ll even offer substitutions you can use in case something is still missing.
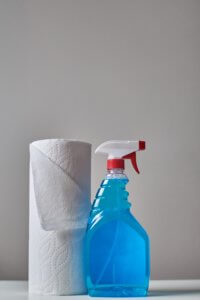
What You’ll Need (Cleaning Agents):

- Grease cleaner. This is especially crucial if you have one of those older range top stoves where grease tends to stick and build-up during cooking. You can buy a heavy-duty grease cleaner or try using white vinegar mixed with dish soap.
- Wood cleaner. If you have any wood surfaces to clean in your apartment, it’s best to avoid cleaning them with water. A good one will remove dirt while polishing your wooden surfaces.
- Bathroom cleaner w/ bleach. This will power through even the toughest bathroom build-up while eliminating germs. Plus, it leaves your toilet bowl sparkling clean!
- Dish soap. Other than doing your dishes, you can use dish soap to boost other cleaners. It’s good for degreasing, cleaning floors and patio furniture, and some even swear by it as a carpet stain remover.
- White vinegar + baking soda. You can’t leave out this classic dynamic duo. While it may not have the freshest scent, white vinegar is a total boss at getting things clean. Use it on your kitchen sinks, your drains, even toilet bowls. It’s also good at getting out stubborn carpet stains and cleaning out your refrigerator.
- Glass cleaner. Most people swear by their Windex, but any glass cleaner with ammonia will get the job done. You can also use a spritz to loosen dirt, grime, or waxy build-ups. In a pinch, you can use it as a floor cleaner. And it shines up a stainless steel or enamel sink in no time flat!
Armed with this arsenal of grease-cutting bacteria-fighting solutions, there’s nothing you won’t be able to clean. That’s a double negative, so you know we mean business.
But wait—there’s more.
What You’ll Need (Cleaning Tools):
1. Rubber gloves
Cleaning chemicals can be rough on your skin (looking at you, Bleach). Protect your hands while scrubbing with a few pairs of rubber gloves.
Or just one pair if you’re planning to dispose of them after cleaning. Otherwise, it’s recommended to use one pair for kitchen tasks and a separate pair for tackling the bathroom.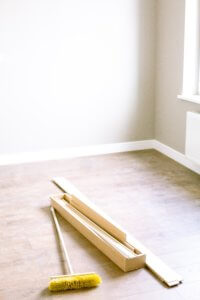
2. Microfiber cloths
These tiny heroes of the cleaning world can handle a multitude of jobs around your home. You can use these, of course, for dusting or cleaning mirrors and windows.
3. Vacuum cleaner
Can’t skip the floors! If your vacuum cleaner isn’t up to snuff, see if you can borrow someone else’s. A good vacuum cleaner is worth the investment.
4. Broom and dustpan
It’s likely that not everywhere in your apartment has carpet. A good broom and dustpan work wonders for most kitchen floors.
5. Mop and bucket
Much like the broom and dustpan, but these buddies deal with wet floors over dry.
6. Paper towels
There’s always a call for these — they are so versatile. Keep at least one roll on hand for your moving clean-out session.
The select-a-size option is especially nice if you’re doing a lot of small jobs as well.
7. Antibacterial wipes
Easily clean and disinfect all hard surfaces with these handy wipes. Great for kitchen, bathroom, and even on doorknobs, light switches, and appliances.
8. Sponges, dishcloths, scrubbing pads, steel wool
Use different levels of abrasive sponges/pads for different tasks. Refrain from using steel wool on anything it will scratch (such as stainless steel).
9. Toilet brush
Difficult to scrub a toilet without one! If you already moved yours to the new place, you can pick up a cotton toilet brush for cheap.
10. Duster

Even if you have those microfiber cloths on hand, you can’t beat a good duster with a handle sometimes. Use it to reach high places. The Swiffer dusters are nice for ceiling fans and cobwebs.
11. Putty
Enough to fill in any holes in the walls.
12. Optional supplies: caddy, lint roller, toothbrush, grout brush, newspaper
- A caddy helps cart your supplies around with you, but if you have a smaller apartment, it’s probably unnecessary.
- A lint roller or piece of pumice stone is a must if you had a pet in the apartment! Goodbye dog hair and cat fur.
- Toothbrushes or grout brushes are great for getting in little spaces or between tiles.
- Some swear by using newspaper to get the best streak-free clean on their windows and mirrors.
Now that you’re fully loaded up on supplies, it’s time to go room to room and achieve the ultimate clean.
So keep reading!
Related: Your Full Guide to Moving Out for the First Time
The Complete Apartment Cleaning Checklist

When you look around your now-empty apartment, some things will stick out to you. You definitely need to clean the floors, right?
But what about the walls? The baseboards? The window your dog loved wiping his nose all over?
Here’s a plan for how to hit it all and in the proper order.
Tip: You’ll want to start high and end low.
Yes, you read that right.
Do the following for every room in the apartment:
- Start by taking your duster (or just your broom) and clearing any cobwebs.
- Check every wall for nails, pins, or screws. Smooth plaster over any remaining holes.
- Dust ceiling fixtures and ledges.
- Clean the windows, dry carefully for a streak-free shine.
- Wipe down the walls and all baseboards.
- Don’t forget to clean light switches and outlets.
- Last but not least, now that all that dust and debris has been knocked down—vacuum
- Treat any stains beforehand
We’re not through yet!
How To Deep Clean Your Bathroom
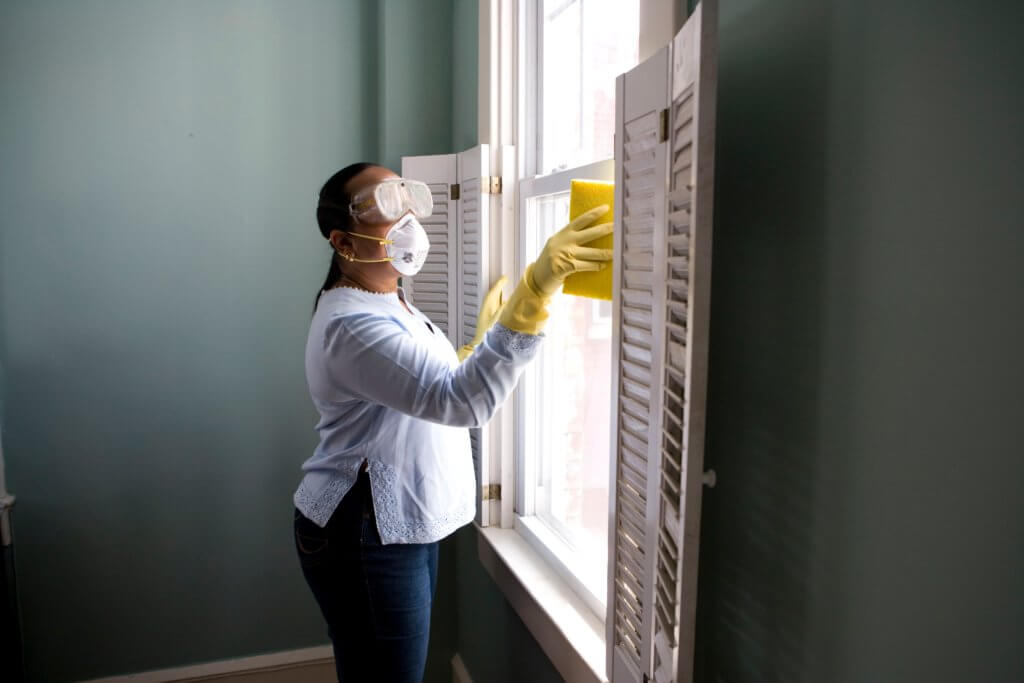
Even if it’s small, apartment bathrooms can be daunting to clean. Hit these key areas, and you’ll be good to go. But first, consider snapping on a pair of those rubber gloves.
- Start by double-checking you’ve emptied all drawers and cupboards of the vanity. Remove any liners, use your wipes (or a sponge with cleaner) to clean out any debris or hair.
- Scrub the toilet with bleach. Clean around the whole thing, not only inside the bowl.
- Wash the sink and any countertops with a sponge and the cleaner with bleach (or your homemade vinegar solution!). Do the sink after the countertop.
- Clean the mirror, taking care to leave it splatter and streak-free.
- Next, clean the tub and/or shower. Scrub the tiles, bleach the grout if necessary.
- Optional: If you have an exhaust fan in your bathroom, check it out. Is it dusty? Give it a quick wipe or vacuum.
- Lastly, sweep then mop the floor.
Related: 5 Bathroom Design Tactics for a Cleaner Year
Make That Kitchen Sparkle & Shine

It may just be me, but I’d rather clean a bathroom than a kitchen. Don’t worry, with these awesome tips, even cleaning out the refrigerator/freezer won’t be such a chore.
How to Clean the Oven:
First, things first. Most ovens come with a self-cleaning option. It takes a few hours, so turn that on right away.
When the oven finishes with its self-clean, wipe out any remaining ashes. Check the FAQ section for how to clean an oven without a self-clean feature.
How to Clean the Refrigerator/Freezer:
You can spray the inside of your fridge (and freezer if it needs cleaning) with a white vinegar/water solution. Be sure to concentrate on soiled areas and then let it sit.
Remove shelves, ice cube trays, and drawers (if possible) for easy cleaning in the sink with warm, soapy water. While those are drying, head back to your fridge and wipe it dry with a rag.
If the drawers and shelves are still wet, give them a quick dry with a cloth and pop them back in the fridge/freezer. Poof! All done.
How to Clean the Dishwasher:
Pull out the bottom rack as far as you can and clean around the drain. Use a paper towel to clear any debris from the spinning arms and their holes.
Now, place a cup or bowl on the bottom rack of your (empty) dishwasher and fill it with white vinegar. Put a small bowl with a half cup of baking soda on the top rack. Let the dishwasher run through a hot water cycle. Don’t open it right away, set a timer and allow the steam to work its magic for 20 minutes.
When the time’s up, open the door, remove the cup and bowl and wipe the inside of the dishwasher with a clean sponge or paper towel.
How to Clean the Microwave:
Not every apartment comes with a microwave. But you likely have your own, so here’s an easy way to clean it just in case! Much like the dishwasher, white vinegar is your best helper against a dirty microwave.
Place a bowl of one cup of white vinegar mixed with one cup of water inside. Microwave 5-10 minutes (depending on how powerful your appliance is). When it’s done, remove the bowl and wipe down with a microfiber cloth.
You can clean the outside of the microwave with a damp rag. Use vinegar for any stubborn spots.
How to Clean Drawers/Pantries:
Just like in the bathroom, double-check all cupboards and drawers. Dispose of all liners. Wipe them out. Don’t forget the outside of the cabinet or the pantry doors.
Once you’ve finished all the appliances, clean your countertops, floors, and sink. In that order!
Getting there, but we aren’t done yet.
Optional Areas
Next, we’ll cover some more unique areas that you may or may not have at your apartment. If you don’t have an outdoor space, garage, or laundry room—feel free to skip ahead and check out the frequently asked questions section.
Balconies and Outdoor Spaces:
Remove all personal items or patio furniture before cleaning. Sweep the balcony (or patio). Spot clean any stains with an all-purpose cleaner. Wipe down railings if necessary. Clean the sliding glass door, including vacuuming out the track.
If you’re responsible for a piece of lawn, mow it one last time and pull any weeds.
Garage:
Just make sure it’s completely empty of all your personal belongings. Then give it a final sweep.
Laundry Room:
I may be repeating myself here, but double-check that all your personal stuff is out of the laundry room. Clean up any lint. You can easily wipe up detergent spills with a damp microfiber cloth. Sweep and mop the floor if applicable.
Bonus Tip: How To Make Your Own Cleaning Supplies
If you prefer more natural cleaners to harsh chemical ones, here’s an easy way to throw together your own all-purpose spray. The best part is—you only need three ingredients!
- In a spray bottle, mix together ½ cup white vinegar, 2 cups of water, and up to 20 drops of your essential oil of choice. (Lemon is always nice, as is lavender!)
- Screw the top on and gently swirl to mix.
- It’s ready to use immediately, or you can save it for later.
FAQs

Q: My oven doesn’t have a self-clean option, how do I clean it?
A: Oven cleaner products exist for this scenario. Purchase one of these heavy-duty sprays, apply liberally inside the oven, and let it dry. Then wipe it out!
Q: I can’t get the drip pans on my stove clean, any tips?
A: Don’t spend too much time on these if they’re really burnt up. You can buy replacement drip pans at the store for pretty cheap.
Q: Should I check the batteries in the smoke detector?
A: This is a nice thing to do, but not necessary. Smoke detectors are often covered by your apartment maintenance.
Q: Do I need to replace burnt-out lightbulbs?
A: If you have replacements on hand, go ahead and swap out bulbs while you’re cleaning your light fixtures and ceiling fans. If you don’t, your landlord may charge a small fee.
Hate cleaning? Learn about Handy to see how their team of cleaning professionals can help.
The Final Word on Getting Your Deposit Back
Of course, all rental properties have their own specific standards for what they want to see clean when you move out. Hopefully, this info was included in your lease agreement. If you’ve misplaced yours, you can always ask the office for a copy of their requirements as well.
And what about that new place you’re moving into? Check out this great article for a 10-Step Home Organization Checklist. Keep your space well organized, and no cleaning task will ever get the best of you!
Gather your supplies, work top to bottom, and maybe throw on some tunes. Have fun with it, or if you’re feeling overwhelmed still—you can always consider hiring a company to do your move out clean for you.
![]()
![]()
![]()
![]()
![]() (No Ratings Yet)
(No Ratings Yet)![]() Loading...
Loading...