How to Get Your Sprinklers Winter-Ready
When winter is around the corner, we homeowners start our checklist for cold-weather planning.
Bring out the heavy coats and thermal long johns, check the furnace or HVAC unit to make sure it’s working, and … get our sprinklers winter-ready?
Yes, sprinkler winterization is an important part of preparing for the ground to freeze. Forgetting this task on your winter checklist can mean problems when spring is here, and you try to water your yard.
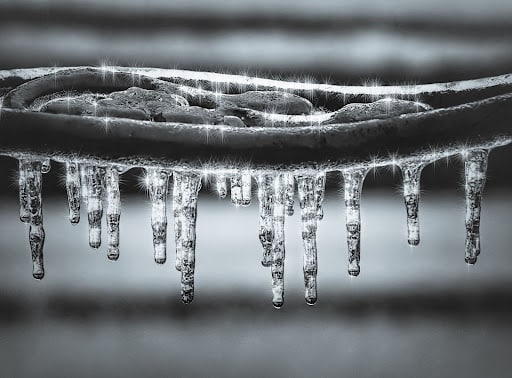
Sprinklers are a necessary part of healthy lawn maintenance. They keep your yard looking lush and green. To do that, the underground pipes pull water from the attached system and spread it through the sprinklers. If the pipes get cold, the water freezes, and the pipe bursts.
Obviously, no one wants that to happen. So, proper sprinkler winterization should be added to your checklist at the end of your climate’s watering season. If this is your first time doing this, we’ve made the steps easy and put them all together in this guide.
Solution: Follow these four steps Shut the water off, turn the timer off on your sprinkler system, drain the water from your sprinkler system, and check any above-ground components.
1. Understanding Your Sprinkler System
Before you start any home improvement or repair project, it’s smart to understand how the whole system works.
Think of it like trying to put together a car engine but skipping a bolt because you can’t find where it’s supposed to fit. That one missing piece could destroy the rest of the engine.
Neglecting a crucial part of your sprinkler system’s functionality could damage the whole thing and then some.
Breaking Down the Irrigation and Sprinkler System
Your sprinkler network connects to various parts of the house and yard, and if you overlook one aspect, it could affect the entire irrigation system, which impacts all your plumbing.
The irrigation system delivers fresh water inside and outside of your house. Every plumbing pipe and fixture is part of this system, including the sprinklers.
When you install lawn and garden sprinklers, you do so with the intent of using them in the spring and summer to keep the yard green and lush. Most of today’s sprinkler systems run on a timer. These provide homeowners control over when their yard is watered using an automatic schedule.
The Pieces of the Sprinkler System
Computerized components are highly susceptible to freezing weather, as are many of the other parts of the sprinkler system. Let’s break these pieces down here:
- The shut-off valves turn off the entire water supply — it’s a wise idea to know where yours are before an emergency happens, and you need to use this feature.
- The main line that supplies water to all pipes is typically buried 6-12 inches under the ground. This is called the manifold.
- Sprinkler zones are measured areas to prevent multiple sprinkler heads from overlapping and overwatering certain areas. These lines are determined by the pipes that stem from the main line.
- Sprinkler zone shut-off valves that can turn off individual lines rather than the whole system in the event of a leak or other issue.
- Sprinkler heads, also called spigots, which extend out of the lawn and spray the water.
- Backflow preventers, which keep your drinking water from getting contaminated.
Finally, there’s a computerized controller programmed to water the lawn at a certain time each day. Some controllers are basic, and others are highly advanced. Typically, most of these systems have the WaterSense label to help reduce overwatering and increase conservation efforts.
Connecting the Dots — Er, Sprinkler Parts
Putting the system together, you have the main line coming from your district’s water supply. The main line connects to various pipes, sending water throughout your yard and home.
Sprinkler heads (spigots) attach to the pipes in each sprinkler zone and are programmed to do their job with a controller.
It’s a complex system that requires each piece to function properly. When the weather freezes, one burst pipe or frozen section can damage the rest, but this is easily avoided by winterizing your sprinklers.
2. When to Start Sprinkler Winterization
Now that you know how important it is to get your sprinklers ready for the cold weather, the question is when to start.
Water freezes at 32°F (0°C), but you don’t want to wait until the temperatures get to that level before you start winterizing.
The End (of Watering Season) Is Near

As everything does, the watering season eventually runs its course, coming to a natural end. You may not realize it, but you’re paying attention to the weather and watching for signs that your yard won’t be green much longer, no matter how much you water it.
Temperatures begin to drop consistently, and jackets, pants, and long sleeves replace the warm weather clothes. That’s about when it’s time to start winterizing the sprinkler system.
Before the first hard freeze hits, your lines need to be drained or blown out. A hard freeze is when temperatures go below (not at) the freezing point. When that happens, a functioning sprinkler system is in danger of damage.
Keep an eye on the weather forecast. When you see a potential hard freeze coming within the next week, it’s time to start the process of prepping your pipes for the cold.
What Happens if You Miss the First Hard Freeze?
Sure, watching the weather channel might be what you do when you want to fall asleep. But in the transition between warm and cold weather, it’s an important job.
Missing the first hard freeze could be severely damaging to your pipes. You could get lucky and have no problems, or the damage could be extensive and expensive.
Blowing the water out of the pipes ensures there’s nothing inside of them to freeze. Frozen water expands and pushes on the pipes, causing them to crack or burst.
You may not notice a crack until you try to use the sprinkler system again. A burst, on the other hand, will be almost immediately noticeable. Either way, repairing the underground damage is difficult and costly.
Damage can also occur when the water inside the spigot freezes. The pressure pushes the head off the sprinkler or cracks it down the edges. You’ll need to replace the whole sprinkler head unit if that happens.
However, the most important concern is the manifold: your main pipe and all the valves attached to it. The valves determine how water flows from the main line to the sprinklers. If the main line freezes, it can crack all the valves attached to it. You’ll have to get into the manifold and replace each piece individually, which can be time-, labor-, and money-consuming.
3.Steps to Perform Sprinkler Winterization
Drain as much water from the pipes as possible before the hard freeze to prevent this potential damage from the manifold to the spigot.
Luckily, this isn’t as difficult as it might sound. All you need to do is follow these four simple steps.
Step One: Shut the Water Off
Remember that main valve we talked about earlier that controls all the water in your house? Before performing any plumbing or irrigation tasks, including sprinkler winterization, turn that valve off.
It’s usually near the water meter. If your system uses potable water, you may see two valves that prevent backflow next to the main valve. Flip the switch to turn the main valve and both backflow valves off.
Step Two: Turn the Timer Off
You’ve shut down the water, but now you need to “tell” your sprinkler system to stop working, too. Use the “rain mode” feature if you have it. This mode keeps your programs and settings in place throughout the winter while still powering down your sprinklers. If you don’t have a rain mode, simply power off your controller, and turn it back on when the freezing temperatures are gone and the watering season begins again.
Step Three: Drain the Water
Since you’ve turned the water off, it can’t flow into your system and damage the sprinkler zone. Still, the water that’s already in the pipes can freeze them and the manifold, which, as we mentioned, is the most critical part.
There are three main ways you can get rid of the excess water and winterize your irrigation system:
- Manual draining, where you open the shut-off valves one by one and let the remaining water naturally drain out, then close the manual drain valves. Note: Wear eye protection when you do this, as the water supply system is pressurized.
- Automatic draining allows your system’s components to drain the water for you upon sensing the main valve shut off and drop in water pressure. Loosen the solenoid (plastic cap with wires on the top) to help the remaining trapped water exit.
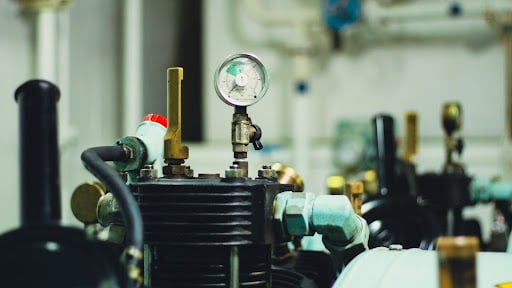
- Blow-out draining uses an air compressor hooked up to the pipes to force the water out of the spigots. Never use the sprinkler blowout method unless your sprinkler system is designed for it; otherwise, it can cause damage and destroy the whole unit. This method is generally reserved for professionals with the proper air compressors handling winterization services.
Step Four: Check the Above-Ground Components
The last step involves walking through your yard and checking all the above-ground components to ensure they’re insulated. Wrap the main shut-off valve, exposed pipes, backflow preventers, and spigots in a foam cover or insulation tape.
Be cautious not to block the backflow device’s air vents or drain outlets, as they’ll still be necessary over the winter months.
When in Doubt, Always Check the Instructions
Pull out your handy dandy user’s manual if you’ve never winterized your lawn sprinkler system before. Your particular sprinklers may require something more specific than these general steps include. Reading the instructions can prevent costly repairs to the entire system.
4. Supplies You May Need to Winterize Your Sprinklers

For the most part, you don’t need too much prep work to do this type of lawn care work. But if you intend to try the blow-out process mentioned above, you should have these items on hand.
- Safety glasses/sunglasses that allow you to see clearly while still fully covering your eye area
- Air compressor with an 80-100 CFM rating, strong enough to force the water out but not destroy the pipes as it does so
- A coupler that fits your particular irrigation system
The right safety gear is crucial, but how you use the air compressor matters, as well. When you need to add more compressed air, do so gradually. This slow increase makes it easier to cut the supply off quickly.
Never stay near an active head as you blow out the irrigation system. For best results, stay under 80 PSI when winterizing PVC pipes and 50 PSI if the pipes are polyethylene or polyvinyl butyral (PVB).
Conclusion
Winterizing your sprinkler system is a necessary task to check off your “getting ready for the cold weather” to-do list. The good news is that it doesn’t have to be difficult, and, in fact, many of today’s designs make this an automatic process.
Now that you understand how your sprinklers connect to the rest of the pipes in your home, you know the importance of making sure they don’t freeze. Follow these simple steps and keep your safety in mind at all times.
Once this part is done, you can get ready to enjoy the fun that winter brings without worrying about (or dealing with) a damaged sprinkler system.


